Monday, April 9, 2007

Tail Light Clear Coat Polish

So today as a learning project to fixing the crack lines on my spoiler clear coat in the future, I decided to fix up my Tail Light Clear Coat that took the abuse of a Canadian Winter and salt and looked dull and had the same crack lines.

Before picture of the tail light:

Tail Light Before

You see the lines and how dull it is. Hence why I took them off the car and put my all reds back.

My weapons of choice:
3m Swirl Remover (get it here!) and 600 grit Sandpaper:
3m Swirl Mark Remover
Mothers Powerball (get it here!):
Mothers Powerball

So wet sand the clear coat down to remove imperfections and for me I used 600 grit as anything higher would not remove the lines / cracks that were in my clear coat:
Tail Light Clear Coat Wet Sanded

Remember! if you sand to far you may remove all the clear coat. Keep checking to make sure you don't completely remove the clear coat.

Once it is sanded and you see the cracks / lines gone and it looks smooth, its time to use the swirl mark remover:

Here it is on the sanded part of the tail light:
Tail Light with Swirl Remover
I used too much here I think, but oh well :)

Then use the Mothers Powerball to shine those tails up real nice.

Here's two pics of how clear they are:

Tail Light Polished 1
Tail Light Polished 2

Here's three pics showing the difference in Before and After:
Tail Light Polished Compare 1
Tail Light Polished Compare 2
Tail Light Polished Compare 3

If your looking to start up a car related web site, get your domain name registration and web hosting from Domains at Retail.
»»  READMORE...

Monday, March 26, 2007

New Aftermarket Cat Engine Parts Sales

Syd's Eastside Auto Parts now has the capability to offer New Aftermarket Cat Engine Parts to the general public as an authorized IPD distributor and dealer.

For those of you that might also be looking for aftermarket Cat (Caterpillar) motor parts, Syd's Eastside is expanding it's product line into this area. Currently, we are investigating solutions for offering these aftermarket Cat engine parts online. However, we can already order many aftermarket Cat motor parts for you if you would just give us a call at 1-605-665-5119 or Toll-Free at 1-800-505-5119.

IPD is a global manufacturing, engineering and distribution company providing quality components for heavy-duty equipment. IPD focuses on helping equipment owners save money without risk to reliability. IPD has been the standard for heavy equipment component quality, innovation and support since 1955.

Many of these aftermarket parts exceed the Caterpillar original manufacturer's specifications, so although these parts may cost less, they often introduce better reliability over original equipment parts.

IPD parts innovation includes:

  • Grooved connecting rod bearings for use in Caterpillar 3400 series engines which help reduce cavitation and extend bearing life.
  • Crevice seal style liners for Caterpillar 3400 series engines which can help reduce the amount of cylinder liner movement and o-ring failure in these applications.
  • When mechanics complained of excessive blow-by in 3208 Caterpillar engines, IPD developed the first 3-ring pistons with dual ni-resist inserts for this application.
  • IPD was one of the first companies to offer Induction Hardened Cylinder Liners for use in Caterpillar engine applications.
IPD aftermarket heavy equipment parts includes a tremendous variety of offerings for the Caterpillar diesel engine family. An extremely simplified list of the kinds of examples of their products follow:
  • Articulated Cast Steel Pistons with Aluminum Skirts
  • Gallery Cooled Pistons
  • Piston Rings
  • Induction-Hardened Cylinder Liners
  • Crankshafts
  • Camshafts
  • Valve Train Parts
  • Lifters
  • Throwers and Baffles
  • Rocker Arm Buttons
  • Fuel Nozzles
  • Fuel Pumps
  • Water Pump Kits
  • Bearings (i.e.: Copper Alloy Engine Bearings)
  • Bushings
  • Premium Material Gaskets and Gasket Sets (OEM steel or IPD composite)
  • In & Out of Frame Complete Engine Overhaul Kits.
IPD manufacturers superior part products and overhaul kits for:
  • Caterpillar 3406E & C15 Engines
  • Caterpillar 3508/3512/3516 Engines
    -Over 700 part numbers not including gaskets and o-rings!
  • Caterpillar 353/379/398/399 Engines
    -Over 500 part numbers not including gaskets and o-rings!
  • Caterpillar 3304/3306 Engines
    -Over 1000 part numbers not including gaskets and o-rings!
  • Caterpillar 3114/3116 Engines
  • Caterpillar 3126 Engines
  • Older Caterpillar Engine Parts Support includes:
    -D339 -D342 -G342 -D343 -G353 -D346 -D348 -3204/3208

Having your Cat motor configuration number will help expedite the ordering process, as this will give us more information that we can use to look up the engine configuration. In some cases, we may require the equipment serial number.

Call us to order or get more information!
Syd's Eastside Auto Parts
1-605-665-5119 or Toll-Free at 1-800-505-5119

Or Contact Us Online.

-Doug
Syd's Eastside Auto Parts
»»  READMORE...

Friday, March 23, 2007

Heavy Construction & Machinery

Used Heavy Equipment and Machinery; Construction, Utility and Landscaping Vehicles

We have established a new section on our website dedicated to Heavy Equipment & Machinery listings. The listings include many trucks as well as heavy machinery (such as 2 fifth wheel equipped semi-trucks or a crane).

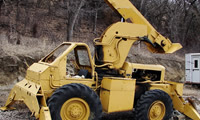
There are construction vehicles such as an Eric truck crane, road service trucks such as an Oshkosh snow plow, utility trucks such as three white 1988 Chevrolet utility trucks, and landscaping truck, such as a 66 inch tree spade truck.

Thumbnail Samples of the Equipment/Machinery Listings you will Find:
Three White 1988 Chevrolet Utility Trucks48 Foot Container Trailer
Austin-Western CraneFord Crew Cab Platform Lift Utility Truck
1979 OshKosh Snow Plow Truck and Dump TruckExcavator Bucket
Gehl Forklift on 20 Ton TrailerGrapple Bucket
The owners of Syd's Eastside Auto Salvage, Inc., and Feimer Construction Company, Inc., are selling this heavy equipment, machinery and construction vehicles on behalf of Fejfar Construction & Equipment.

Currently, we are concentrating on getting photographs of this heavy equipment and machinery online so that interested parties can view the equipment, machinery and vehicles easily. The above thumbnails are merely a small sampling of what is available at the website. As of this writing, there are twenty-one listings, and we still have more photos to take and put online.

Later, we will add more detailed textual descriptions for the listings and then start listing them in on/off-line industry publications and other construction sales oriented websites.

We hope that you may find something that may be of interest to you. If you need more information, please contact us. We would be happy to take more and better photos of any of the heavy equipment, machinery or vehicles that you may be interested in. We are available online through our Contact Form, or you may call us at 1-605-665-5119 or 1-800-505-5119.

Link:
Heavy Equipment & Machinery
»»  READMORE...

Tuesday, February 13, 2007

Body Work: Fix your dents!

Here is a great body work video from Hot Rod TV. They take an old Mustang and throughout the 10 minute video you learn the exact process to pull out a dent, make it smooth and have it ready for paint.

The video highlights:

1) Sanding down the paint to the bare metal to begin pulling the dent
2) Using the dent puller to attach pins and pull out the dent
3) cutting and grinding off the dent puller pins
4) Mixing body filler using the hardener to properly set the body filler
5) Applying the body filler over the dented spot that was pulled
6) Sanding the excess body filler smooth
7) Hand cross-sanding of the body filler
8) Applying primer to the body work area to give an idea how it will be ready for painting later on


Enjoy and hope it can help you pull your own dents and make a car body work repair!

Regards, MK
Visit our sister blog, the Car Buyer Guide.
»»  READMORE...

Wednesday, January 10, 2007

Custom Painted Taillights

Custom body work on a car will make your car stand out from another car. Today's project shows a method to do some custom work to get custom painted taillights.

I bought an extra set of 94-97 Integra taillights (with the orange turn signal) for $25, in order to try and make something unique. Here is what it looks like:

94-97 Integra Tail light

First step I wanted to do in making it custom was removing the orange turn signal and making it look more like the 98+ integra taillights. Here is what the 98+ taillights look like:

98 Integra Tail light

The process to red out your taillights can be done either using paint or vinyl. My first attempt was using the Krylon Stained Glass red paint. I masked off everything so only the orange was exposed. I don't have a picture of this but the idea is to put masking tape and newspaper surrounding the orange so you only paint over the orange.

This was the final product of the tail light red out process:

Integra Tail light Red Out Picture 1
Integra Tail light Red Out Picture 2

Now, from this part I was going to proceed to painting a green trim on the taillights, but decided to try using vinyl on the taillight to see what difference that would make in the look of the red out taillight. I used acetone paint stripper to remove the krylon paint from my taillights to reexpose the orange blinker. I then got a transparent red vinyl sheet and cut out the vinyl to match the shape of the orange blinker. I have no pictures of this process, but u basically wet the taillight slightly where you will apply the vinyl to give you some leeway in putting it down and then put the vinyl on and squeegee the excess water out making sure you get it all out completely. I also used a hair dryer to make the vinyl stick better and form around the corner of the taillight.

At this point I was satisfied with the way the vinyl red out looked on the taillights and proceeded to set up to paint my taillights with a green trim.

I masked all the parts that were to light up with newspaper and masking tape. Once the taillight was masked, I sprayed three thin coats of green paint onto the taillight, leaving about 5 mins between coats. After my last coat, I left it to dry for about 20 minutes and then proceeded with the clear coat on the taillights. Here are some pictures with the taillight masked and the green painted on top of it:

Integra Tail light Masked and Painted Green 1
Integra Tail light Masked and Painted Green 2
Integra Tail light Masked and Painted Green 3

In this picture I highlight the parts I masked:

Integra Tail light Masked Areas

Once I was done spraying the lights, I let them dry and then removed the masked newspaper and tape to reveal my newly complete Green Custom Painted Taillights. I then installed them onto the car and here are the results:

Completed Custom Green Integra Tail light Picture 1
Completed Custom Green Integra Tail light Picture 2
Completed Custom Green Integra Tail light Picture 3
Completed Custom Green Integra Tail light Picture 4
Completed Custom Green Integra Tail light Picture 5
Completed Custom Green Integra Tail light Picture 6

I was quite happy with the paint match and how it gave a unique look to the car. Hope my adventure into creating my custom painted taillights will make you think about how you can customize your ride and its taillights!

Regards, MK
Cheap domain name registration available for your Car Body work blog available at Domains at Retail!
»»  READMORE...
 
Privacy Policy